Readme Guidelines
Requirements
The documentation must be written in English.
Use the Markdown syntax.
Since V17, the OCA documentation is written in the Markdown syntax, which is a human-readable format easy to use for non-technical profiles.
Here is some documentation about the Markdown syntax.
If the Readme files are not converted in markdown, you can ask a tech person to do it.
Documentation to convert a rst file into a markdown file, section "What are the impacts of those changes?".
Use Headers
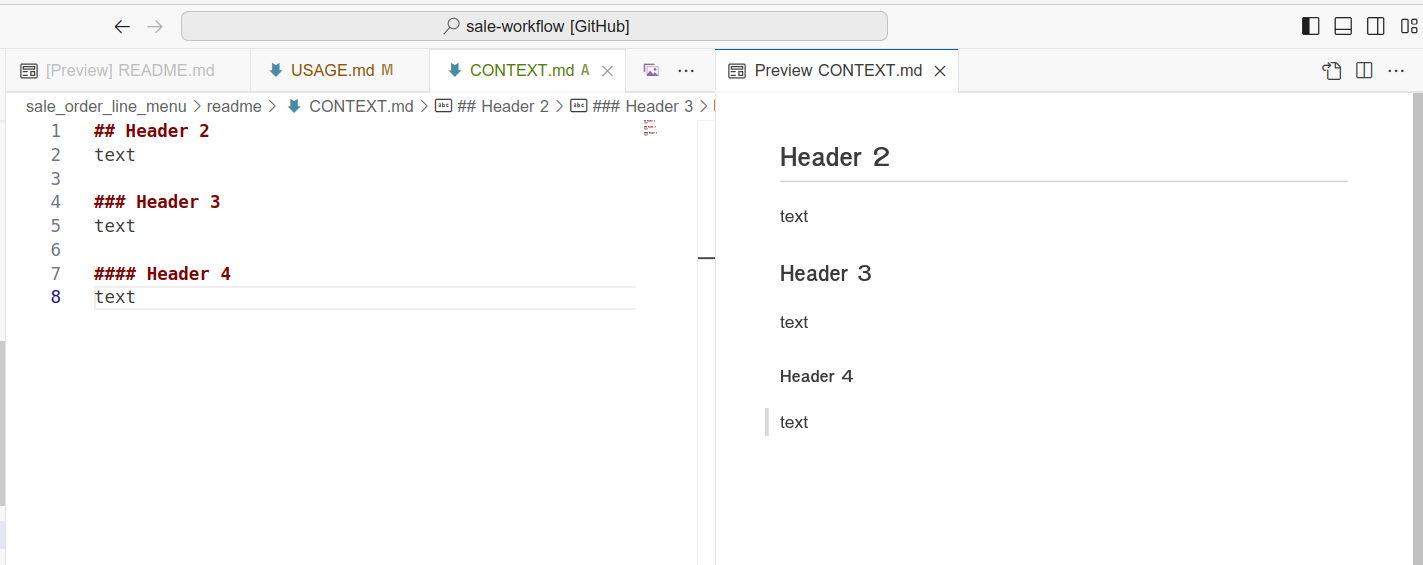
Use headers to structure the content of a file such as CONTEXT, CONFIGURATION or USAGE.
Example :

WARNING!
You cannot use the usual Markdown style Header 1 (#) because in Markdown it represents the main title and in OCA Readme fragments, the Header 1 title will be automatically generated by the OCA bot from the fragment’s names (for example “Usage” will be a 1 title in the final Readme).
So you must start your documentation with Header 2(##)
So you must start your documentation with Header 2(##)
ALT Text (Image Text Alternative)
This text is displayed if the image cannot be shown in the browser. It is a description of the image.
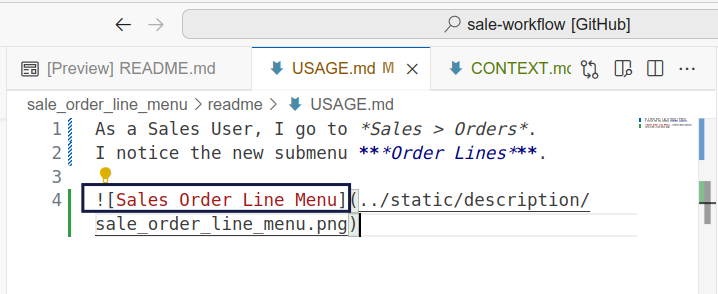
- Markdown ALT Text : 
Example : Here we replace the Alt text by Sales Order Line Menu.

Tips & Tricks
Keep it short and simple.
Good example : Go to Sales > Orders. Select or create a Quotation / Sales Order.
Bad example : You need to go on the Sales app, then click on the menu Orders and then, select or create a Quotation / Sales Order…
1 sentence / 1 image
In the Usage and Configuration sections, take the reader to a step by step explanation where you have one sentence followed by a screenshot / image showing what has been described above.
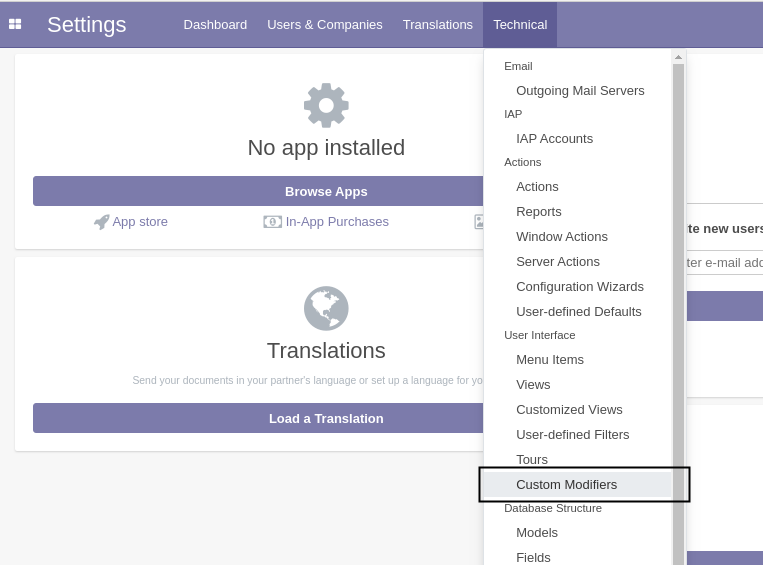
Example :
As system administrator, I go to Settings / Technical / User Interface / Custom Modifiers.

I create a new custom modifier.

Add Screenshots or GIFs
Image Format
Recommended Image format : PNG or GIF
Recommended Screenshots tools
Linux
Shutter The best screenshot editor for Linux users!
-
Shutter is available under Ubuntu Software. If you are using another Linux distribution, here is the download link : https://shutter-project.org/downloads/third-party-packages/
Peek gif creator
-
Peek is available under Ubuntu Software
Windows
Built-in Windows screenshot tool
Awesome screenshot Chrome/Firefox extension
Recordit gif creator
Screenshots
When taking screenshots, it is important to think about giving the context of where you are in the application but also to be sure that we can easily read the text.
So here are a few tips :
-
Zoom in your browser. We recommend a 110% or 125% zoom for better results.
-
Resize your window. On your keyboard, press F12. It will open the browser’s developer tools to let you resize your window without losing any information.
-
Be sure the top bar (with the menus) is visible, as well as the relevant fields. Don’t screenshot the top of your browser.
Use the analysis method 5Ws
Five Ws, Five Ws and one H, or the Six Ws are questions whose answers are considered basic in information-gathering.They include :
Référence : https://business.adobe.com/blog/basics/project-management-101-the-5-ws-and-1-h-that-should-be-asked-of-every-project#what-are-the-5-ws